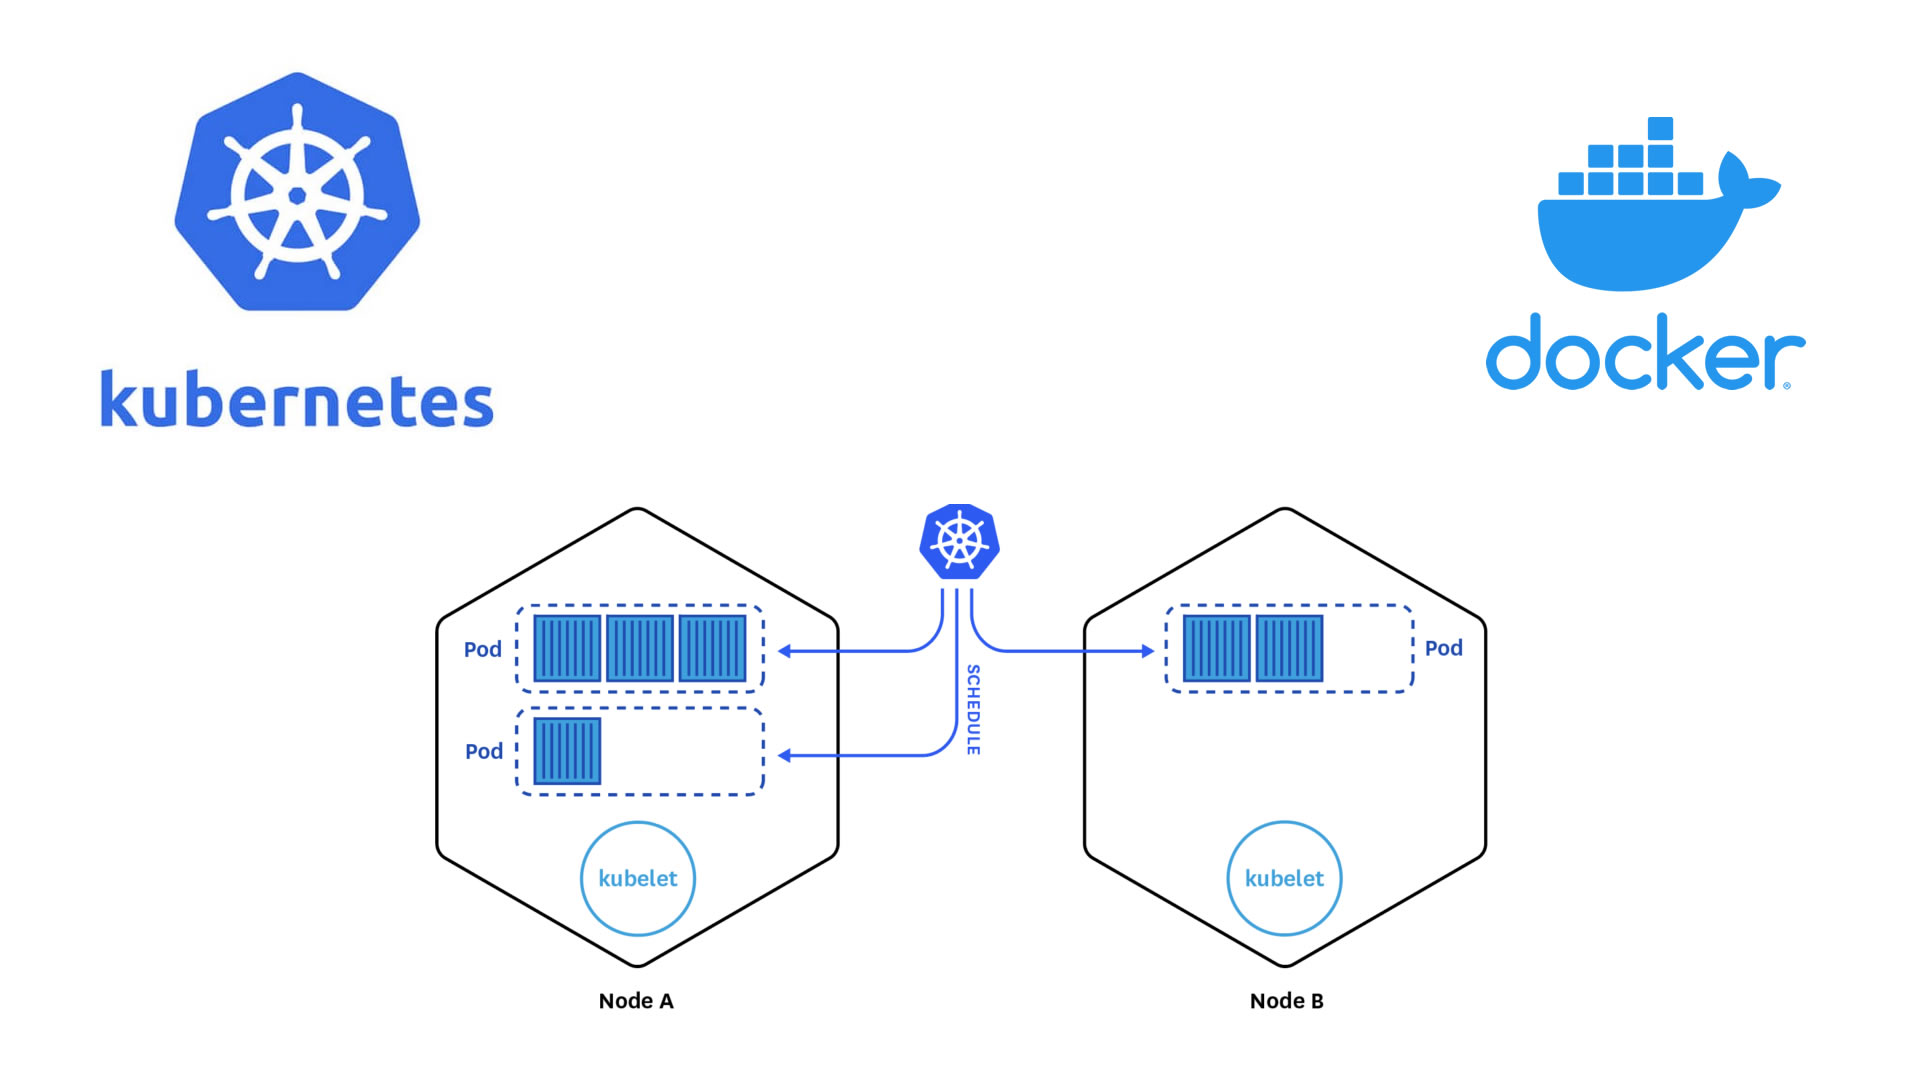
kubernetes containers docker orchestration Tutorial: How to Install Your First Kubernetes Cluster Kubernetes lets you orchestrate your containers in a very simple way Rafael Escalante · Actualizado Jun 14, 2026 **Kubernetes** is a **container** orchestration system that enables the automated and organized deployment of containers, allowing developers to deploy container-based applications in an agile and secure manner. In this tutorial we will define the basic concepts used in Kubernetes, explain what a container is and how it can be deployed on a system, and finally install a Kubernetes cluster. ## What is a Container? A **container** is a software package that includes all the essential services needed for the application inside it to run properly, without requiring a direct dependency on the operating system — making containers highly versatile and lightweight. A container includes only the services necessary for the packaged application to run without issues, and can be replicated according to the user's needs. For example, this blog at [rescalante.com](https://rescalante.com) can be **containerized** with only the services required to run it (mainly web services). If the blog receives too many simultaneous users, the system — through an orchestrator like **Kubernetes** — can replicate the rescalante.com application multiple times to handle the demand (which increases processing resources). Once demand drops, the system can remove the containers that were created to handle it, and resource usage decreases accordingly. Now consider the previous example in a cloud environment: a company with an online store can containerize its application so it only pays for the resources tied to active store connections, meaning hardware resource costs scale with demand. ## Why Kubernetes? Tools like [Docker](https://www.docker.com/) allow developers to create containers or multi-container applications through scripts — but how do we manage many containers at once? Or how do we orchestrate multiple applications across a **Data Center** cluster while maximizing resource efficiency? That is exactly where Kubernetes shines, enabling multiple hardware nodes to run multiple container-based applications in real time. [Kubernetes](https://kubernetes.io/docs/concepts/overview/what-is-kubernetes/) requires a master node and as many worker nodes as the user defines. For this tutorial, we will use Virtual Machines to represent our hardware resources in a Data Center. Before we start installing our first Kubernetes cluster, it is important to define the basic objects we can create in our cluster. The goal of this tutorial is not to make you a Kubernetes expert, but to understand the core concepts and be able to test the orchestrator. ## What is a Pod? A [Pod](https://kubernetes.io/docs/concepts/workloads/pods/pod/) is the smallest and most basic deployable object in Kubernetes — a basic execution unit that represents processes running in our cluster. A **pod** encapsulates a container (or in some cases multiple containers), storage resources, a unique IP address valid only within the cluster, and options that define how the container should run. For practical purposes, a Pod can be thought of as the logical definition of a Container in Kubernetes. Pods have a lifecycle governed by a **Deployment** and a **ReplicaSet** — they live and die according to the rules defined in a **Deployment**, enforced by the ReplicaSet. ## What is a ReplicaSet? A [ReplicaSet](https://kubernetes.io/docs/concepts/workloads/controllers/replicaset/) is a rule defined through a Deployment in Kubernetes, used to guarantee the availability of a specific number of identical Pods. Think of the ReplicaSet as a sergeant commanding a squad of soldiers (the Pods) — they follow its orders unconditionally, even unto death. ## What is a Deployment? A [Deployment](https://kubernetes.io/docs/concepts/workloads/controllers/deployment/) is a set of declarative instructions given to our Kubernetes cluster. All ReplicaSets and Pods align to what a Deployment dictates. For example, a web application Deployment can instruct a ReplicaSet to scale Pods from 5 to 10 when simultaneous requests exceed 5,000, distributing those Pods across nodes where hardware resources are available. When traffic drops, the Deployment can reduce the required Pod count back to 5, and the ReplicaSet enforces the termination of the extra Pods. ## What is a Service? A [Service](https://kubernetes.io/docs/concepts/services-networking/service/) is an abstraction that exposes the application defined in a Deployment — backed by a group of Pods — as a network-accessible endpoint. In other words, a Service is how applications running inside your Kubernetes cluster present themselves to the outside world. For example, a web application backed by 20 Pods can be exposed through a single IP address, which acts as the contact point for all 20 Pods. Thanks to Services, users never know whether their request is hitting Pod #1 or Pod #12 — it's completely transparent. Whenever you make an online purchase, that transaction is likely running on some Pod somewhere in the world with available resources. ## Our First Kubernetes Cluster Now that we've defined the basic units in **Kubernetes**, let's proceed with installing our first cluster. You will need at least two virtual machines with: - Ubuntu Server 18.04 LTS or 20.04 LTS - 2 vCPUs - 2 GB RAM - An available IP address on your local network The **first virtual machine** will be called `master-vm` and will serve as our Kubernetes master node. The second will be called `minion1-vm` and will be our first worker node for running Pods. If you want additional worker nodes, simply name them `minion2-vm`, `minion3-vm`, and so on. ## Installing the Kubernetes Master Node Connect to the command line of your first virtual machine and run the following commands to update **Ubuntu Server**: ```sh sudo apt update && sudo apt upgrade -y ``` Per **Kubernetes** requirements, you must disable the Ubuntu swap partition: ```sh sudo swapoff -a ``` To permanently disable swap, edit the `fstab` file with nano: ```sh sudo nano /etc/fstab ``` Add a `#` at the beginning of the line `/swap.img none swap sw 0 0` so the file looks like this: ```sh # /etc/fstab: static file system information. # # # / was on /dev/sda2 during curtin installation /dev/disk/by-uuid/6b043bc0-71d5-4de8-93ce-09d7eb21eaa0 / ext4 defaults 0 0 #/swap.img none swap sw 0 0 ``` Install **Docker** as the container runtime: ```sh sudo apt install docker.io ``` Enable Docker to start on system boot: ```sh sudo systemctl enable --now docker ``` Allow Docker to run without `sudo`: ```sh sudo usermod -aG docker YOUR_USERNAME ``` Reboot the virtual machine: ```sh sudo reboot ``` After the reboot, configure IP tables to see bridged traffic (required for Kubernetes internal networking): ```sh cat < **Note:** This tutorial assumes the Ubuntu Server firewall is disabled. If you need to run with the firewall enabled, open TCP ports **6443**, **2379**, **2380**, **10250**, **10251**, and **10252** on the master node, and ports **10250** and **30000–32767** on worker nodes. Install **kubelet**, **kubeadm**, and **kubectl**: ```sh sudo apt update && sudo apt install -y apt-transport-https curl curl -s https://packages.cloud.google.com/apt/doc/apt-key.gpg | sudo apt-key add - cat < **IMPORTANT:** You can add the `--pod-network-cidr` flag to specify the IP block for internal Pod communication. The default is `192.168.0.0/16`. Configure `kubectl` to run without `sudo`: ```sh mkdir -p $HOME/.kube sudo cp -i /etc/kubernetes/admin.conf $HOME/.kube/config sudo chown $(id -u):$(id -g) $HOME/.kube/config ``` Install the **Calico** network add-on to enable Pod-to-Pod communication: ```sh kubectl apply -f https://docs.projectcalico.org/v3.11/manifests/calico.yaml ``` > **IMPORTANT:** If you used a custom Pod network CIDR, download `calico.yaml` first and update the `CALICO_IPV4POOL_CIDR` parameter to match. For this tutorial, we'll allow the master node to run Pods (not recommended for production): ```sh kubectl taint nodes --all node-role.kubernetes.io/master- ``` To add worker nodes, you'll need the master's **token** and **hash**: ```sh # Get the token kubeadm token create # Get the hash openssl x509 -pubkey -in /etc/kubernetes/pki/ca.crt | openssl rsa -pubin -outform der 2>/dev/null | openssl dgst -sha256 -hex | sed 's/^.*' ``` ## Installing a Kubernetes Minion Node Connect to your worker node VM and repeat the same steps as the master: update Ubuntu, disable swap, install Docker, configure bridge networking, and install kubelet/kubeadm/kubectl. Then join the cluster: ```sh sudo kubeadm join : \ --token \ --discovery-token-ca-cert-hash sha256: ``` Where: - `` — the token generated on the master node - `` — the master node's IP address - `` — TCP port **6443** (Kubernetes default) - `` — the hash generated on the master node After a few minutes, verify from the **master node**: ```sh kubectl get nodes ``` You should see both your **master node** and **minion node 1** reporting in the cluster. Repeat this process to add more minions. ## Testing Our Kubernetes Cluster by Deploying NGINX [NGINX](https://nginx.org/) is a lightweight web server available as a container image — perfect for testing our cluster. We'll deploy **5 Pods** running NGINX and expose the application through a **Service** on TCP port **80**. Create the deployment: ```sh kubectl create deployment nginx --image=nginx ``` Verify the pod, ReplicaSet, and deployment: ```sh kubectl get pods kubectl get replicasets kubectl get deployments ``` Expose the deployment by creating a `myservice.yaml` file: ```yaml apiVersion: v1 kind: Service metadata: name: nginx-service spec: selector: app: nginx ports: - name: http protocol: TCP port: 80 targetPort: 80 externalIPs: - ``` Apply it: ```sh kubectl apply -f myservice.yaml kubectl get services ``` You can now access NGINX at `http://`. Scale up to **5 Pods**: ```sh kubectl scale --current-replicas=1 --replicas=5 deployment/nginx ``` Verify the scale-out: ```sh kubectl get pods kubectl get replicasets kubectl get deployments ``` You should now see **5 NGINX pods** running, with the ReplicaSet enforcing the count and the Deployment orchestrating it all. [Kubernetes](https://kubernetes.io/docs/concepts/overview/what-is-kubernetes/) is a container orchestration system that opens up a world of possibilities for application development. I hope this tutorial was helpful — please leave your comments or suggestions below! --- #### References - [Docker](https://docker.com/) - [Kubernetes Setup](https://kubernetes.io/docs/setup/) - [Kubernetes kubectl Cheatsheet](https://kubernetes.io/docs/reference/kubectl/cheatsheet/)